Flutter?Andorid?GeneratedPluginRegistrantで起動できない
Flutterで作っててたまに出る以下のメッセージ。
Running Gradle task 'assembleDebug'...
/path/to/project/appname/build/app/intermediates/javac/debug/classes/io/flutter/plugins/GeneratedPluginRegistrant 2.class: D8: Type io.flutter.plugins.GeneratedPluginRegistrant is defined multiple times:
build配下にあるファイルなのでbuildディレクトリをまるっと削除して再度実行でOK。
何度も出るので怒りで書いた
FlutterでListViewで死ぬ
普通にListView.builderで構築したところこんなエラーがでて画面のListViewが構築できない・・・
RenderBox was not laid out: RenderRepaintBoundary#da13e relayoutBoundary=up2 NEEDS-PAINT
'package:flutter/src/rendering/box.dart':
Failed assertion: line 1927 pos 12: 'hasSize'


Either the assertion indicates an error in the framework itself, or we should provide substantially more information in this error message to help you determine and fix the underlying cause.
In either case, please report this assertion by filing a bug on GitHub:
  https://github.com/flutter/flutter/issues/new?template=2_bug.md
ソースはこんな感じ
    return Scaffold(
      ... 省略
      body: Column(
        children: [
          Container(...省略),
          Container(...省略),
          ListView.builder(
              itemCount: _searchResults.length,
              itemBuilder: (context, index) {
                return Card(
                  child: Padding(
                    child: Text(_searchResults[index].showDate, style: TextStyle(fontSize: 22.0),),
                    padding: EdgeInsets.all(20.0),
                  ),
                );
              }
          ),
        ],
      ),
   );

  }
エラーメッセージの下の方にFlutterでエラーが出てるからイシューたててね💖的なの書いてありギョッとしてたんだけど、あぁ、、イシュー立てるのか・・・めんどくさい・・・と絶望的になってたのですがエラーメッセージ内の「RenderBox was not laid out: RenderRepaintBoundary」で検索すると以下のStackOverflowが・・・
The problem is that you are placing the ListView inside a Column/Row. The text in the exception gives a good explanation of the error.

To avoid the error you need to provide a size to the ListView inside.

I propose you this code that uses an Expanded to inform the horizontal size (maximum available) and the SizedBox (Could be a Container) for the height:
なるほどーーColumの中に直接ListView書くとビューのサイズがわからんので構築できないと・・・さすがStackoverflowさんです。気を取り直して修正してOKでした。
先のソースのListView.builder...の部分をExpanded-SizeBoxのコンテナで囲んでます。
          Expanded(
              child: SizedBox(
                height: 200,
                child: ListView.builder(
                    itemCount: _searchResults.length,
                    itemBuilder: (context, index) {
                      return Card(
                        child: Padding(
                          child: Text(_searchResults[index].showDate, style: TextStyle(fontSize: 22.0),),
                          padding: EdgeInsets.all(20.0),
                        ),
                      );
                    }
                ),
              ),
          ),
件のStackoverflowのエラーの問題は自分のとは別の問題みたいなんだけど、問題解決できました。
ちゃんちゃん
docker install(Mac)
brewでのインストールもあるらしいが普通にインストーラーからやってみる
ここから対象のOSのインストーラーをダウンロードしてダボークリックでインストール。
自分の場合はM1チップなのでMac for Apple Chipをインストール
インストールしたあとにランチパッドからDockerを起動。はじめインストール後になにかウイザードが動くのかと待ってたら何も起きなかったので困った困った。
ターミナルから以下のコマンドでもいいらしい。かっこよくタッターンと起動したい場合はこちら。
% open /Applications/Docker.app
起動するとタイトルバーにクジラのマークが出るのでDockerが起動しましたとなもし。

とりあえずバージョンを表示
% docker --version
Docker version 20.10.11, build dea9396
おーわーりー
home brew インストール
単純に公式サイトのコマンドコピってぺって実行じゃできなかったのでメモ

公式サイト
brew.sh
公式サイト表示するとインストールは書いてあるコマンドをコピーして実行すればいいみたい。
実行するとパスワード入力を求められるので入力すると数分で終わります。
じゃぁお前の実力を試してみようか、、とバージョンでも表示してみます。
% brew -v
zsh: command not found: brew
あれ?コマンド無いだと・・・ターミナルをよく見たら書いてあった
==> Next steps:
- Run these two commands in your terminal to add Homebrew to your PATH:
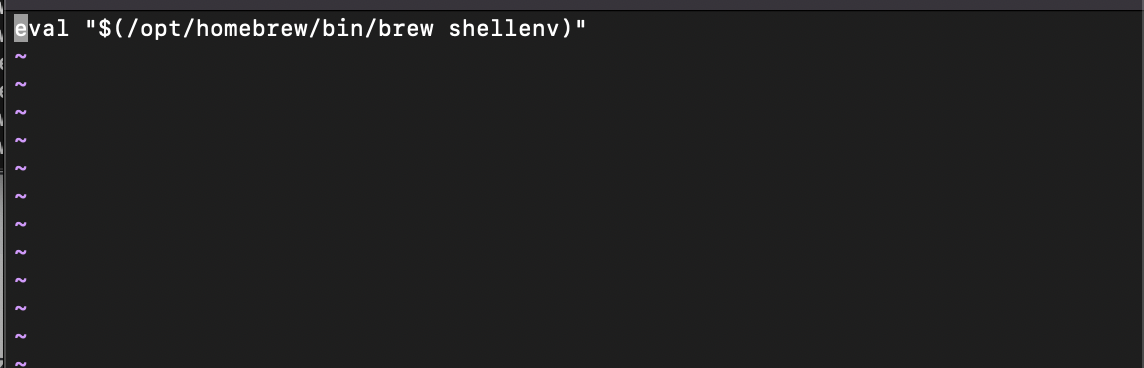
echo 'eval "$(/opt/homebrew/bin/brew shellenv)"' >> /Users/hosokawashinya/.zprofile
eval "$(/opt/homebrew/bin/brew shellenv)"
- Run brew help to get started
- Further documentation:
https://docs.brew.sh
次を実行すればいいらしい
echo 'eval "$(/opt/homebrew/bin/brew shellenv)"' >> /Users/hosokawashinya/.zprofile
eval "$(/opt/homebrew/bin/brew shellenv)"
home brewへのパスを~/.zprofile に書き込むみたいね。以下はvi ~/.zprofile で表示したもの。
気を取り直してバージョン表示
% brew -v
Homebrew 3.3.9
にっこり
flutter始め方メモ
MacbookProを新しくしたのでFlutterを始めから入れるためのメモを書いておきます。
Flutter自体のダウンロード
Flutter SDK自身はこちらからで任意のプラットフォームのZipをダウンロード
開発環境として以下のようなディレクトリを考える。下記の例はMac。
+ ~/Documents/
+
+   +ーー /dev
+   +   ※ここで開発
+
+ーー /libs
    ※ここにFlutter SDKをインストール
※libディレクトリをホームにしてるのはiCloudから外すため。
インストールページには以下のように書いているのでディレクトリ等を読み替えて実行
cd ~/development
unzip ~/Downloads/flutter_macos_2.8.1-stable.zip
以下が読み替えで実行したもの、libディレクトリに/flutter というディレクトリが作成されています。
cd ~/libs
unzip ~/Downloads/flutter_macos_2.8.1-stable.zip
FlutterSDKへパスを通す
この/flutterディレクトリへパスを通しますが、インストールページでは以下のように紹介しています。
export PATH="$PATH:`pwd`/flutter/bin"
ただし、インストールページでも書いてますが、これだとセットしたターミナル限定のパスになってしまうため、.bash_profileなどに追加しておくと良いです。ページによると echo $SHELLで利用するシェルがわかるのでそれ用のファイルに書いておきます。購入したMacは/bin/zshと表示されるので.zshrcファイルに記述します。
.zshrc
export PATH="$PATH:`pwd`/libs/flutter/bin"
保存した後は source ~/.zshrc で反映されます。
flutter doctor の実行
flutter doctorを実行していきますがこれが出たら素直にインストール
しかしながら今回購入したMacはM1チップのCPUでFlutterはM1チップを対応中(2021/12現在)のためこんなメッセージが出ることがあります。
% flutter doctor
 Bad CPU type in executable
その場合は以下のコマンドでM1が解釈できるバイナリにする必要があります。なんかアグリーしてくれと言われるので"A"でエンターすればいいです。
% softwareupdate --install-rosetta
I have read and agree to the terms of the software license agreement. A list of Apple SLAs may be found here: http://www.apple.com/legal/sla/
Type A and press return to agree: A
2021-12-21 18:42:46.297 softwareupdate[6137:213942] Package Authoring Error: 002-23768: Package reference com.apple.pkg.RosettaUpdateAuto is missing installKBytes attribute
Install of Rosetta 2 finished successfully
%
気を取り直してflutter doctor してみます。
% flutter doctor
Running "flutter pub get" in flutter_tools...                       9.6s
Doctor summary (to see all details, run flutter doctor -v):
[✓] Flutter (Channel stable, 2.8.1, on macOS 12.0.1 21A559 darwin-arm, locale ja-JP)
[✗] Android toolchain - develop for Android devices
    ✗ Unable to locate Android SDK.
      Install Android Studio from: https://developer.android.com/studio/index.html
      On first launch it will assist you in installing the Android SDK components.
      (or visit https://flutter.dev/docs/get-started/install/macos#android-setup for detailed instructions).
      If the Android SDK has been installed to a custom location, please use
      `flutter config --android-sdk` to update to that location.

[✗] Xcode - develop for iOS and macOS
    ✗ Xcode installation is incomplete; a full installation is necessary for iOS development.
      Download at: https://developer.apple.com/xcode/download/
      Or install Xcode via the App Store.
      Once installed, run:
        sudo xcode-select --switch /Applications/Xcode.app/Contents/Developer
        sudo xcodebuild -runFirstLaunch
    ✗ CocoaPods not installed.
        CocoaPods is used to retrieve the iOS and macOS platform side's plugin code that responds to your plugin usage on the Dart side.
        Without CocoaPods, plugins will not work on iOS or macOS.
        For more info, see https://flutter.dev/platform-plugins
      To install see https://guides.cocoapods.org/using/getting-started.html#installation for instructions.
[✓] Chrome - develop for the web
[!] Android Studio (not installed)
[✓] Connected device (1 available)
なんか色々でましたが[X]がついている項目を[✓]になるように直していけばいいです。バッテンついた下あたりを読めば大体やることは書いてあります。最近のものは親切ですね。
Android toolchain
Android SDKが見つからないので以下からAndroid Studio をインストールしてねということらしい
https://developer.android.com/studio/index.html
ダウンロード後、インストールして初回に起動した際に色々設定があり、Android SDK Componentがインストールされます。
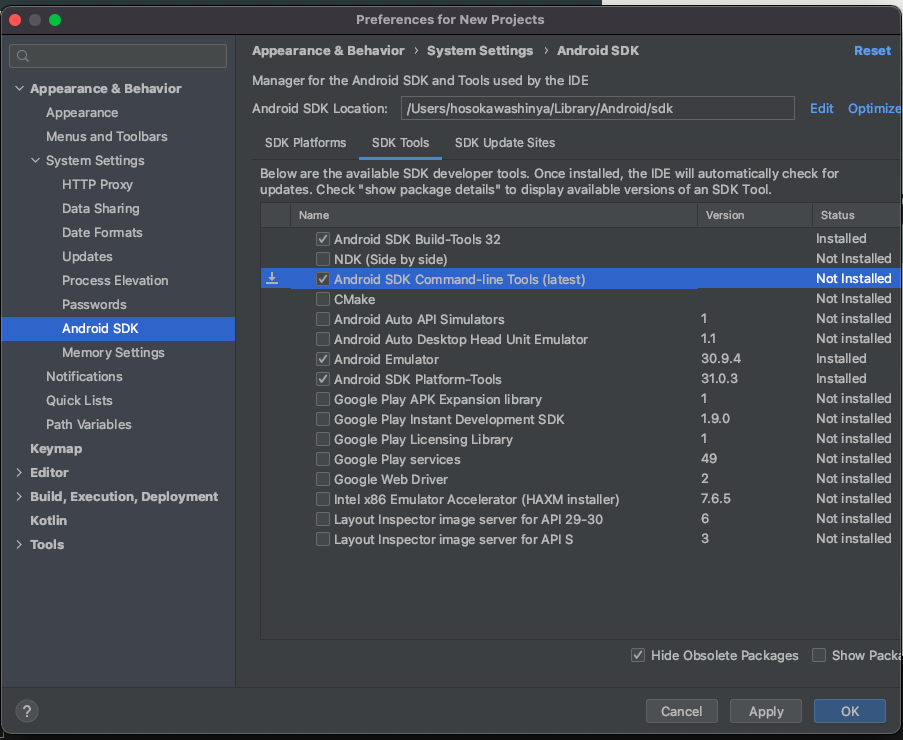
インストール後、再度flutter doctorを実行してみます。あれ?まだあるみたいですね。cmdline-tools がないのと、Android license を許諾してないとのこと
[!] Android toolchain - develop for Android devices (Android SDK version 32.0.0)
    ✗ cmdline-tools component is missing
      Run `path/to/sdkmanager --install "cmdline-tools;latest"`
      See https://developer.android.com/studio/command-line for more details.
    ✗ Android license status unknown.
      Run `flutter doctor --android-licenses` to accept the SDK licenses.
      See https://flutter.dev/docs/get-started/install/macos#android-setup for more details.
cmdline-tools component is missing
これは単純にAndroid StudioでSDK Managerを表示し「Android SDK Command-line Tools(latest)」にチェックを入れて「Apply」するだけです。
Android license status unknown
以下のコマンドでいくつかライセンスを受け入れるか確認してくるのであとは"y"を入力する簡単なお仕事です。
flutter doctor --android-licenses
さて、もう一度 flutter doctorをしてみるとAndroidのエラーや警告は消えてるはずです。
Xcode - develop for iOS and macOS
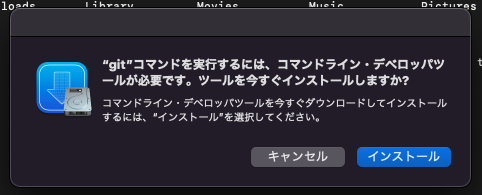
iOS側のエラー/警告はXcodeの未インストールと、CocoaPodsの未インストールなのでチャチャっとインストールします。
インストール後、flutter doctorを実行するとXcodeのライセンスを受け入れる必要があるよ。sudo xcodebuild -licenseを実行してねと出るのでサクッと実行しておきます。
You have not agreed to the Xcode license agreements, please run 'sudo xcodebuild -license' from within a Terminal window to review and agree to the Xcode license agreements.
CocoaPodのインストールは
sudo gem install cocoapods
% flutter doctor
Doctor summary (to see all details, run flutter doctor -v):
[✓] Flutter (Channel stable, 2.8.1, on macOS 12.0.1 21A559 darwin-arm, locale ja-JP)
[✓] Android toolchain - develop for Android devices (Android SDK version 32.0.0)
[✓] Xcode - develop for iOS and macOS (Xcode 13.2.1)
[✓] Chrome - develop for the web
[✓] Android Studio (version 2020.3)
[✓] Connected device (1 available)
flutter にパス通したらflutter doctorコマンド実行してXがついたところを読んで対応、またflutter doctorを実行を繰り返せばいいよん
Android Studioの設定
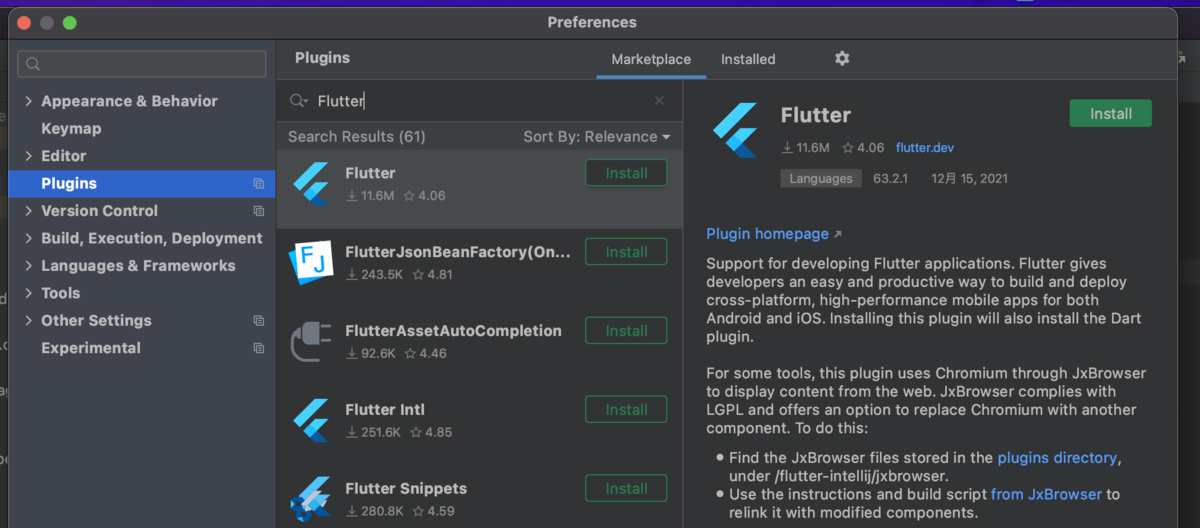
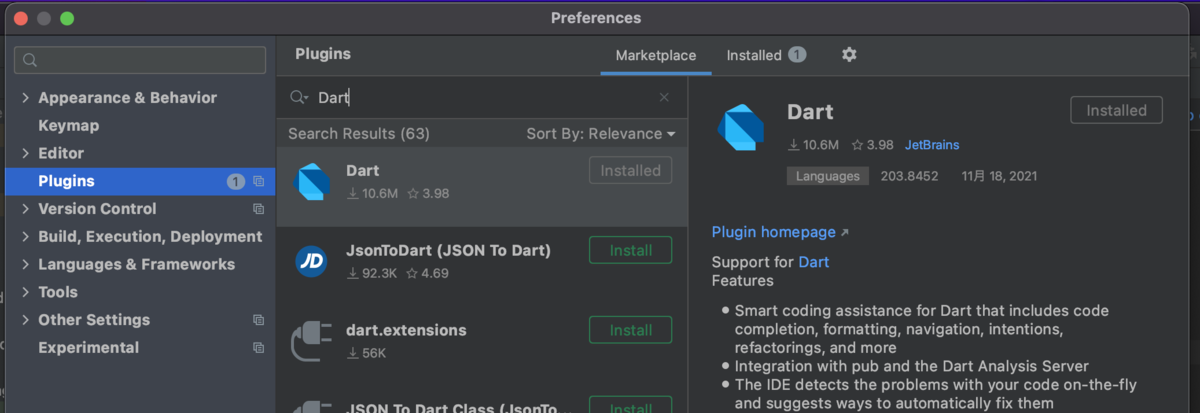
Andorid StudioにFlutterのプラグインを入れます
メニューから「Preference」を押し、ダイアログが表示されるので「Plugin」を表示。
FlutterとDartで検索してプラグインを入れます。
あとは今までのFlutterアプリのプロジェクトを開くなり新規に作るなりFlutter生活のスタートです。
flutter image_gallery_saver のメモ
Flutterでギャラリーに画像を保存する際のライブラリ
本家のExampleに書いてる通りなのだけれどもメモ
ライブラリのインストールはインストールページに書いてあるとおりだけど・・・
Androidの場合Manifest.xmlのApplicationタグ内に以下を書く必要があったり、
android:requestLegacyExternalStorage="true"
場合によりuses-permissionタグを書く必要があったりと色々なサイトで解説とかされています。
<uses-permission android:name="android.permission.READ_EXTERNAL_STORAGE" />
<uses-permission android:name="android.permission.WRITE_EXTERNAL_STORAGE" />
ただ、これらを追加しただけではストレージへのパーミッションをユーザーから得ないと以下のようなエラーが出て画像が保存できません。
android java.io.FileNotFoundException: open failed: EACCES (Permission denied)
まぁ考えてみれば当たり前だったのですが・・・上記のタグはあくまでもこのアプリで画像にアクセスするって宣言で許可はユーザーから得ないと行けないわけで。
Exampleページに書いてあるとおり画面を表示する際でもパーミッションを許可するようリクエストを出す必要があります。
Map<Permission, PermissionStatus> statuses = await [
Permission.storage,
].request();